
Microsoft Teams is becoming an increasingly important and central hub for companies across all industries. This is particularly true in the voice sector, but there are also other areas where you can see rapid adoption of the collaboration platform.
One area where Microsoft Teams is particularly useful is in the availability of data. This blog post describes a common use case where a company wants to migrate its on-premises file server to Microsoft Cloud and SharePoint Online.
While many articles already exist on this topic and explain the Fileserver migration process in detail, we will focus on how one can view this Fileserver migration from the perspective of Microsoft Teams. We will also discuss how to make our migrated data visible in File Explorer.
To do this, we will use three Microsoft Cloud Platforms
- The Microsoft Teams Admin Center
- The SharePoint Online Admin Center
- The Endpoint Admin Center (Intune)
Phase 1
A thorough planning phase is essential for any SharePoint administrator or engineer prior to beginning any implementation. The process of preparing should include analyzing the amount and type of data you will migrate, as well as determining the destination of the data and who should have access to it. Consider introducing tools like sensitivity labeling as an optional step.
Phase 2
Phase 1 ends once you identify the SharePoint sites you will create. In Phase 2 of the preparation process, we move on to creating the target directories in the Microsoft Teams Admin Center in the form of Teams, making sure to distinguish which ones are to be Public or Private.
The steps to do this are as follows:
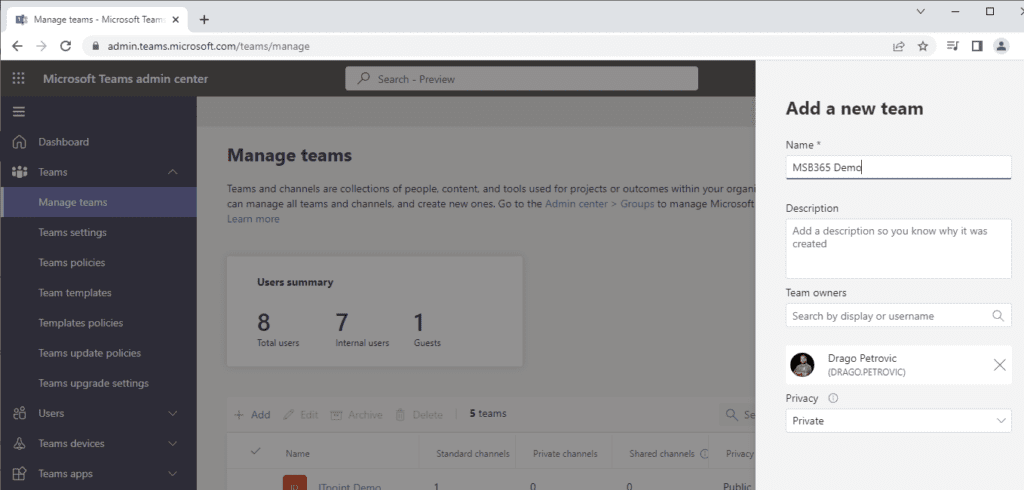
On the Teams Admin Portal, go to Teams > Manage Teams > +Add and create a new team according to our specifications. Microsoft automatically creates a SharePoint Online site for this.
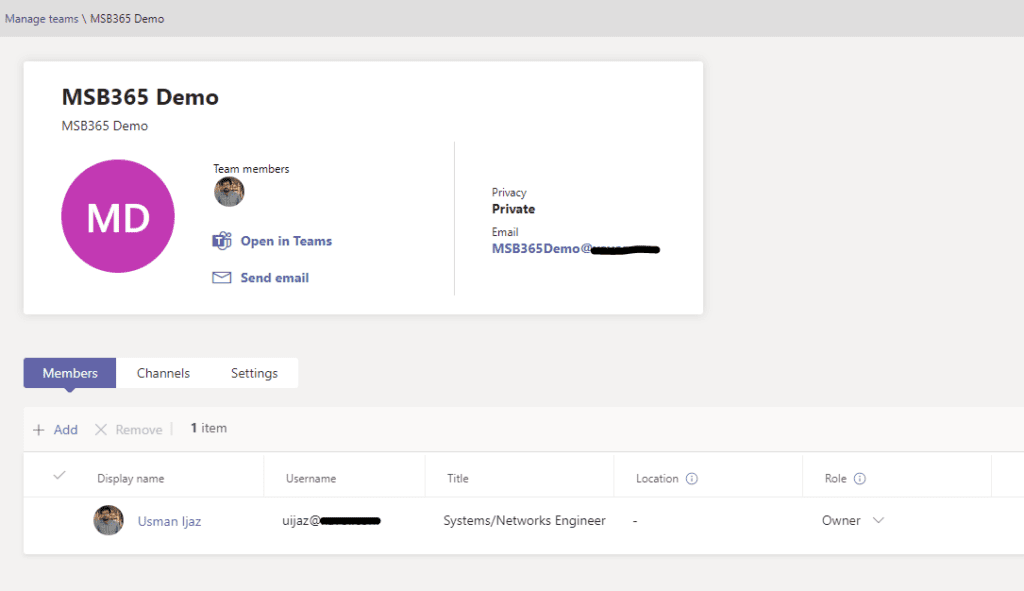
For each new site, you can authorize the users within the team itself, or you can add them later. Additionally, you can create teams using templates that have pre-set channels. This process is repeated for each new site.
Now, you have created the SharePoint sites, and the configuration setting of File Explore will be set up. For this, you have to go to the Endpoint Admin Center (MS Intune):
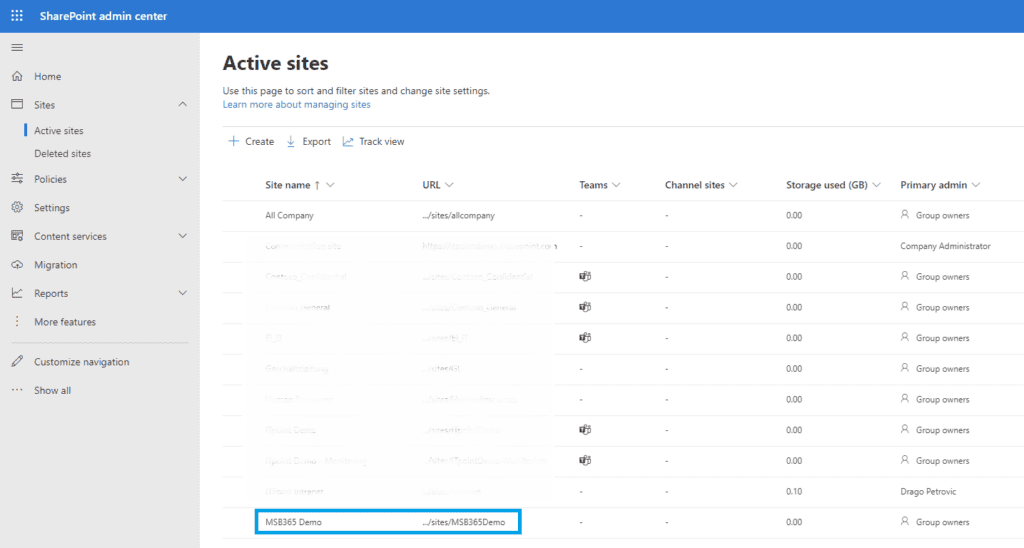
To access the Intune portal, you must first obtain the Library ID. You can do this either in the SharePoint Admin Center on the site itself or by using Microsoft Teams. To do this, open the SharePoint Admin Center and navigate to Sites > Active Sites > then click on the URL of the relevant site.
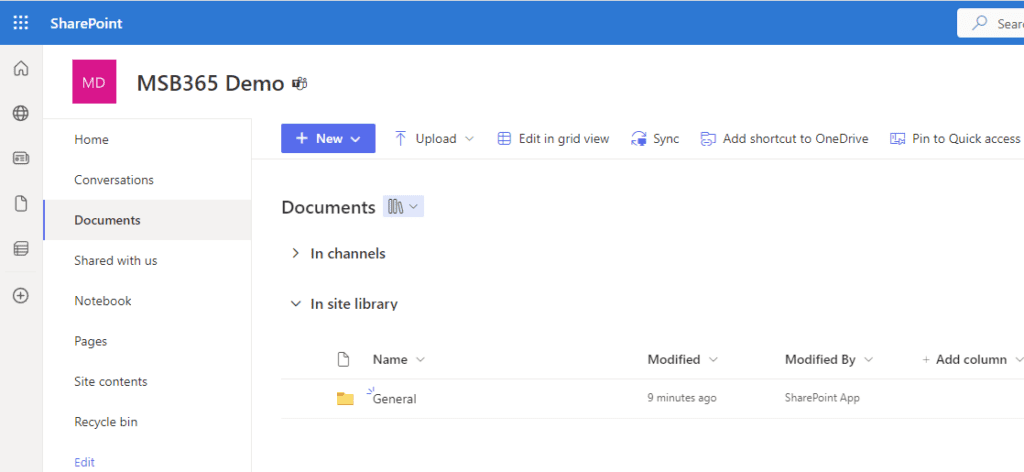
On the corresponding site, go to Documents and then to Sync.
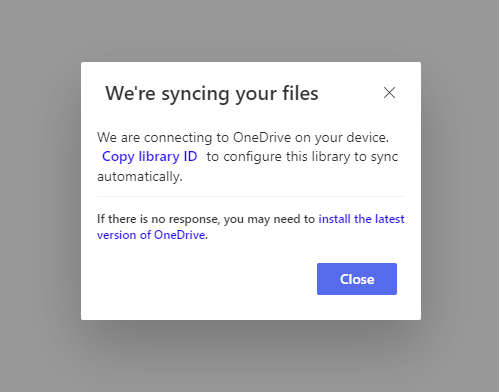
After pressing the Sync button, you will get the option to copy the Library ID, which you will save to the clipboard.
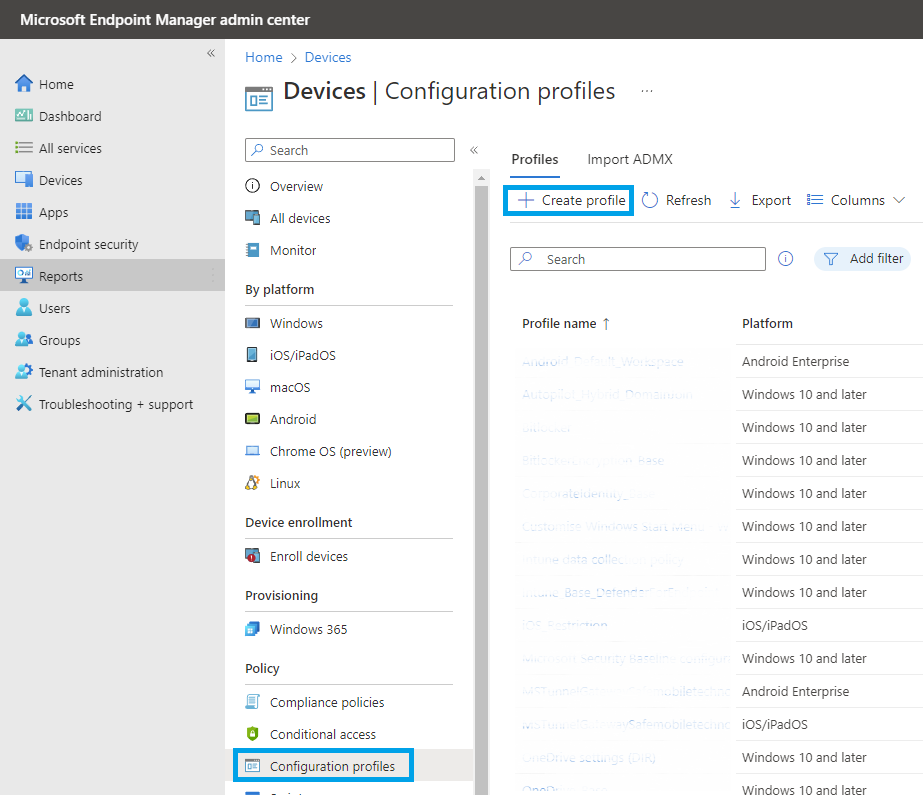
In the next step, you go to the Intune Admin Center.
Here, go to Devices > Configuration profiles and create a new policy with +Create profile.
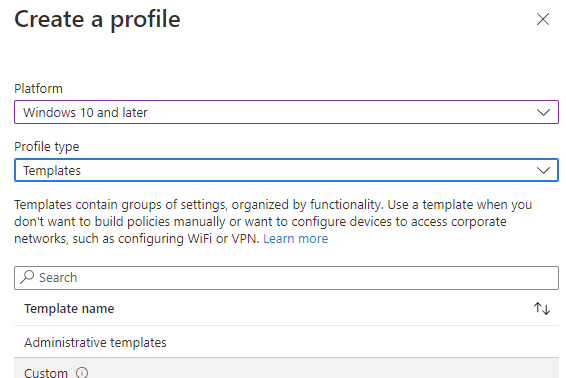
Select Windows 10 and later as the platform and Templates as the profile type. Then continue with Administrative templates.
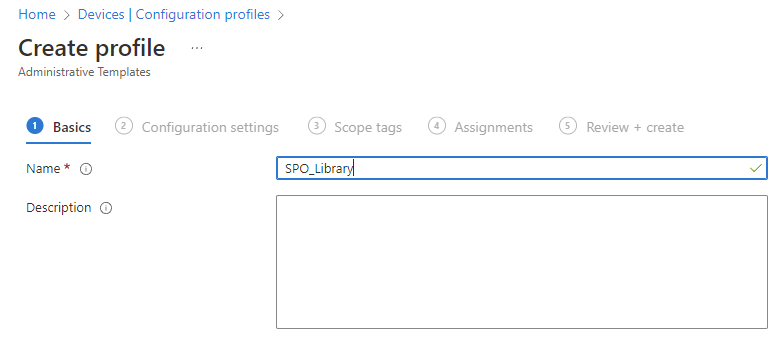
Give the new profile an appropriate name

You must make the following settings here:
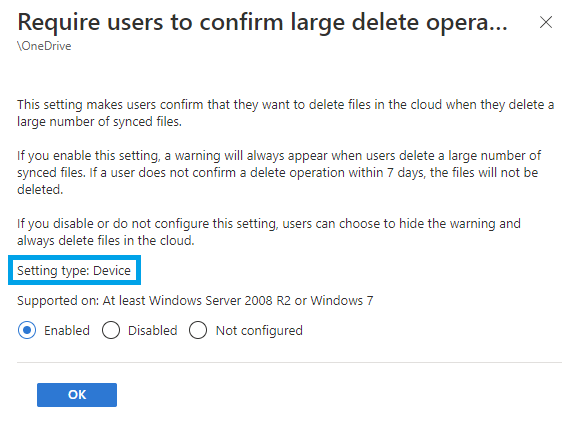
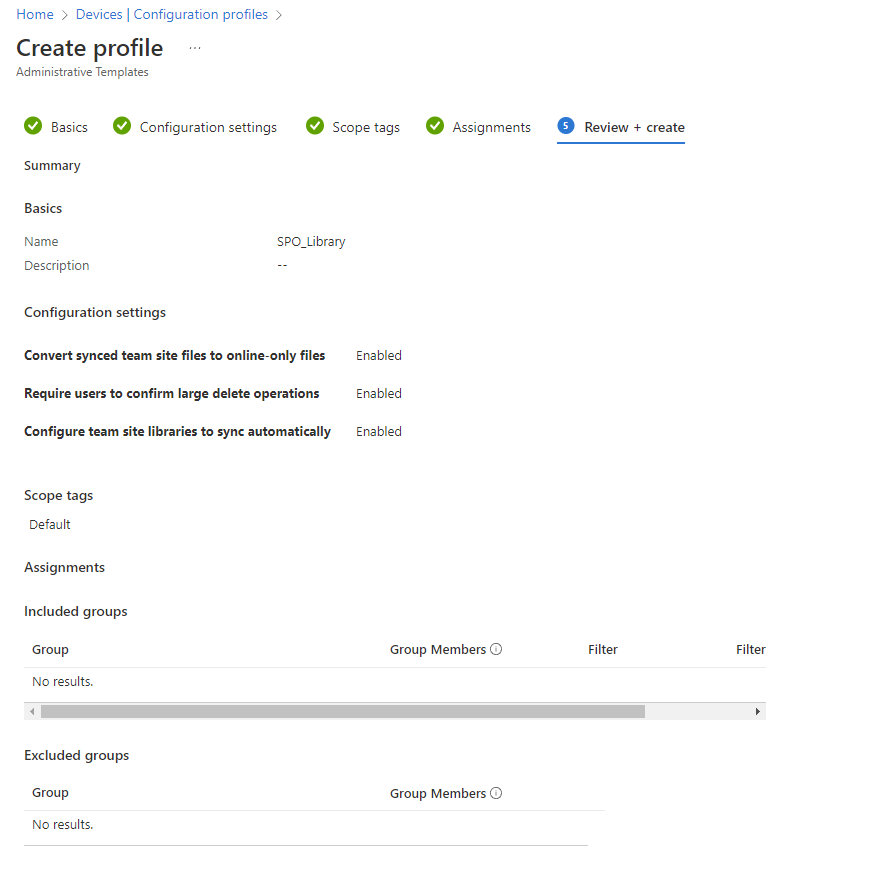
Require users to confirm large delete operations > Enabled
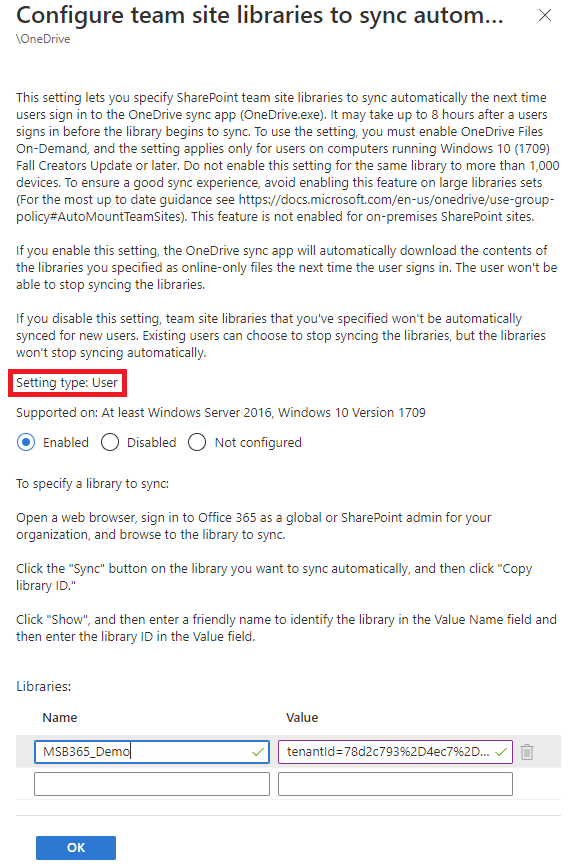
Configure the team site libraries to sync automatically > Enabled
Caution: This setting type is a user setting.
You need the Library ID here, which you copied from SharePoint Online to your clipboard.
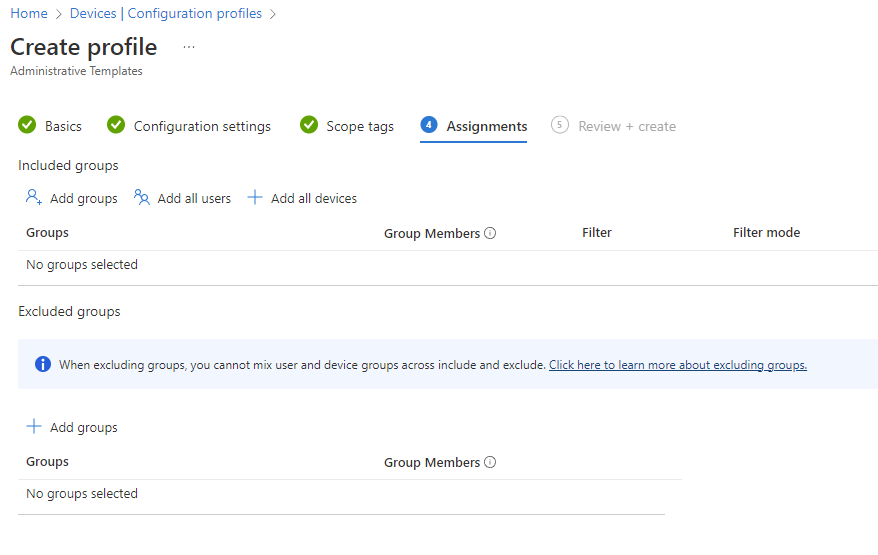
At this point, you still have to assign the corresponding Azure Active Directory authorization group.
Summary
Users can access their documents after preparing for the migration. We give them two options: accessing files through Microsoft Teams or accessing them through Windows Explorer. We need not discuss the SharePoint migration process in detail since there are many articles on it already.
Before moving forward, it is essential to recheck permissions and clarify the following points:
- Who has owner rights to which sites?
- Which users have rights to which sites?
- Are sites allowed to be shared with external users? If so, which ones?
- Are the site permissions set correctly (public or private)?
- Are the configuration files in Microsoft Intune authorized correctly?
Conclusion
It is critical for you to carefully plan and execute a migration to SharePoint Online. This is equally vital to consider the data you will migrate, its destination site, and how you will set permissions.
It is also worth considering the use of sensitivity labels, which provide additional security for your data. However, we suggest you consult an IT firm experienced in SharePoint migrations before executing them, as any hiccups in the process will cost you.
If you want assistance with your SharePoint Fileserver migration, contact us at [email protected]. Xavor offers SharePoint services and will ensure you have a smooth migration.