Introduction of Three-Tier AWS Architecture
The three-tier AWS architecture consists of three tiers: a presentation tier, a logic tier, and a data tier. The following diagram illustrates an example of a generic three-tier application.
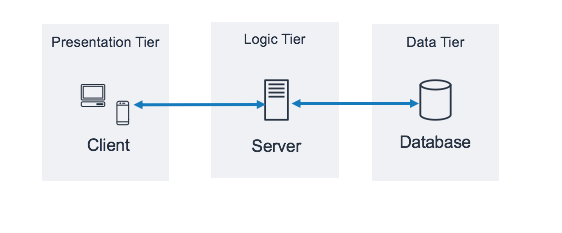
This type of architecture is found in client-server applications, such as web applications that have a frontend, a backend, and a database. Each tier, or layer, performs a specific task and you can manage it independently of the others. This is actually what we do when we move from the monolithic way of building an application where the front end, back end, and databases reside in one place.
Amazon Web Services (AWS) is undoubtedly the leader in DevOps and cloud services these days – it offers secure, scalable, and reliable cloud computing services at excellent prices. It is free to join, and you pay only for what you use. In this blog, we will discuss how to use the following AWS services to design and build a three-tier cloud infrastructure, which will be highly available, resilient, and fault-tolerant at the same time:
- Elastic Compute Cloud (EC2)
- Auto Scaling Groups (ASG) with Launch Template
- Virtual Private Cloud (VPC) with Subnets and Route Tables
- Application Load Balancer (ALB)
- Security Groups
- The Internet Gateway

Benefits of a Three-Tier AWS Architecture
Here are some of the leading advantages of a three-tier AWS architecture.
- Each tier is horizontally scalable, thus making the entire architecture scalable.
- Better reuse is possible.
- Offers higher flexibility as far as configuration and Azure platform deployment are concerned.
- It improves data integrity.
- It offers a great deal of security as your client does not have direct access to the database.
- It is very convenient to maintain and make modifications.
- It offers good performance as the presentation tier performs cache operations. This enables better network utilization and also reduces the load on application and data tiers.
Prerequisites
- An AWS Free Tier account
- A key pair .pem file
Resources Needed to Create a Highly Available Three-Tier AWS Architecture
In general, we will be creating the following resources to accomplish our goal:
- Create a VPC
- Create 2 Public Subnets — one in us-west1a & one in us-west1b
- Create 4 Private Subnets — two in us-west1a & two in us-west1b
- Create an Internet Gateway
- Create a NAT Gateway to associate with the Application’s Private Subnet
- Create 3 Route Tables — one for public subnet and two for private subnets
- Create a Launch Template with a Bootstrap script to install & launch Apache
- Create a Security Group with HTTP & SSH to open to 0.0.0.0/0
- Create Autoscaling Group for Public Subnets
- Create an Autoscaling Group for two Private Subnets in the Application tier
-
Let’s Begin by Creating a VPC
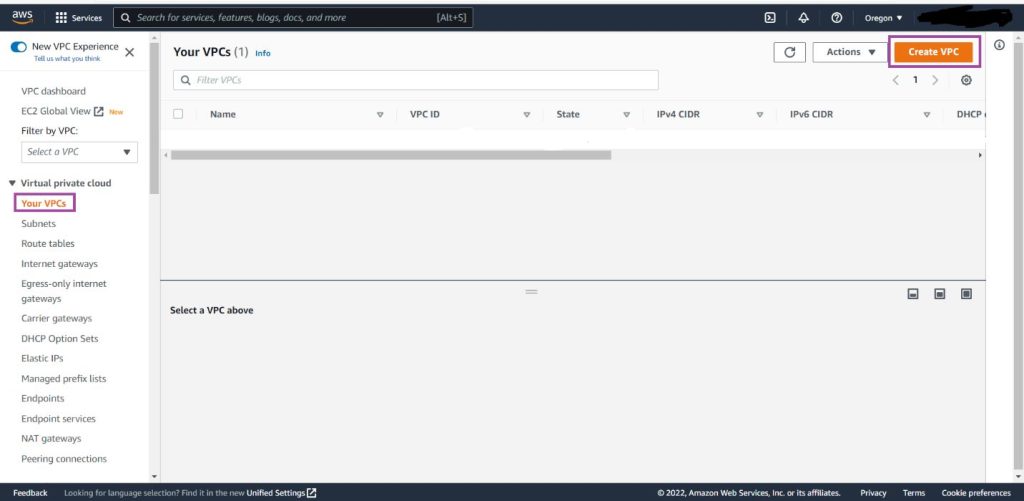
A virtual private cloud (VPC) is a virtual network allocated to your Three-Tier AWS Architecture account. It is logically removed from other virtual networks in the AWS Cloud. You can launch your AWS connect resources, like Amazon EC2 instances, into your VPC.
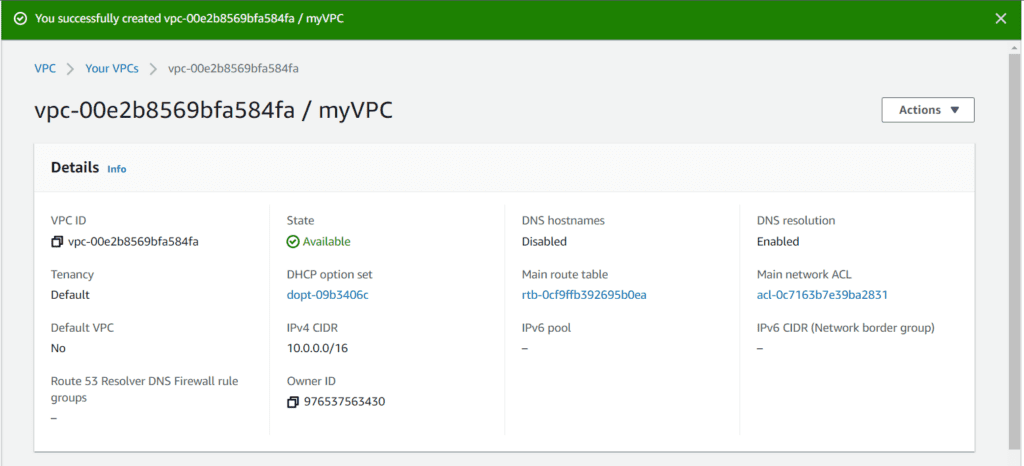
Open the VPC section of the AWS services, and click on the Create VPC button.
Name your VPC and give it a CIDR block of 10.0.0.0/16.
Click on Create VPC.
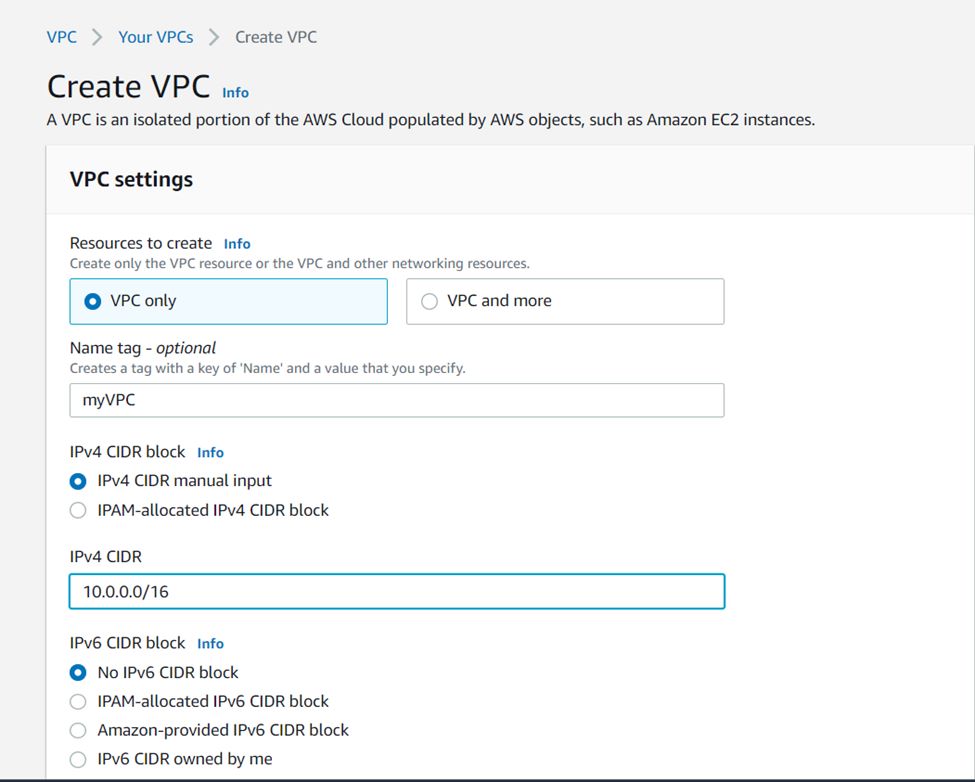
PS: In this lab, we will select “VPC only” and ignore “VPC and more”. Even though you may find selecting “VPC and more” handier for other projects, we will execute every service separately to enable a more holistic understanding of their deployment
-
Create the Required Subnets
AWS subnets is the splitting up of an IP network by IP address. You must link each subnet to a routing table that lays out the eligible routes for outbound traffic leaving the subnet. Furthermore, every subnet you create is automatically linked with the primary route table and default network ACL of the VPC.
Go to the Subnets page and click on Create Subnet.
Locate the correct VPC from the VPC ID drop-down.
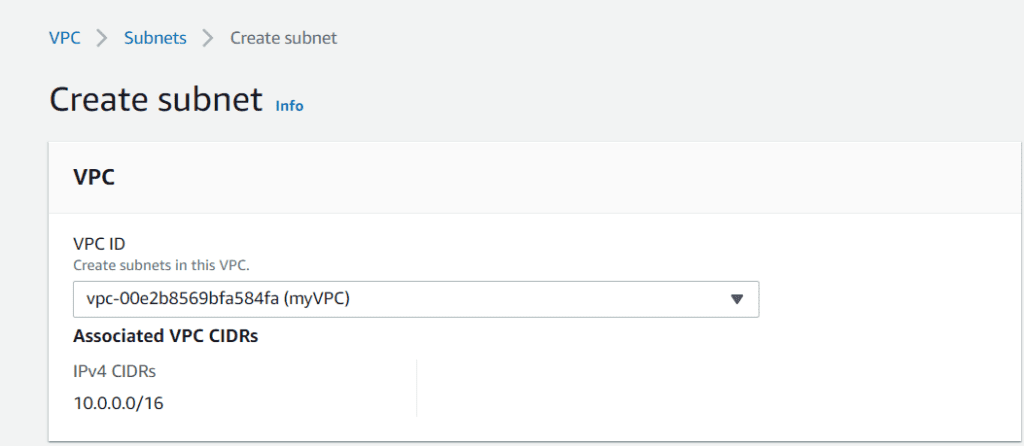
In this blog, we will create 6 subnets. Every subnet needs a CIDR block, and each will fall into one of the two availability zones.
The division of the subnets is as follows:
- Presentation Tier Subnets:
Web-Public-Subnet-1: 10.0.1.0/24 (us-west-2a)
Web-Public-Subnet-2: 10.0.2.0/24 (us-west-2b)
- Application Tier Subnets:
App-Private-Subnet-1: 10.0.3.0/24 (us-west-2a)
App-Private-Subnet-2: 10.0.4.0/24 (us-west-2b)
- Database Tier Subnets:
DB-Private-Subnet-1: 10.0.5.0/24 (us-west-2a)
DB-Private-Subnet-2: 10.0.6.0/24 (us-west-2b)
Select Create once you have configured all the subnets – they will list neatly on your subnets page once finished.

-
Setup an Internet Gateway
An Internet Gateway is a highly available, horizontally scaled, yet redundant VPC component. It enables communication between the instances in your VPC and the internet using VPC route tables for internet-routable traffic. It supports IPv4 and IPv6 traffic and does not cause bandwidth limitations or availability risks to your network traffic.
This is crucial for various applications, including streaming services. For instance, if you are planning to stream content such as YouTube TV abroad, ensuring proper internet gateway setup is key to a smooth and uninterrupted streaming experience
You can attach only one internet gateway per VPC. You are also not charged for the internet gateway in your account.
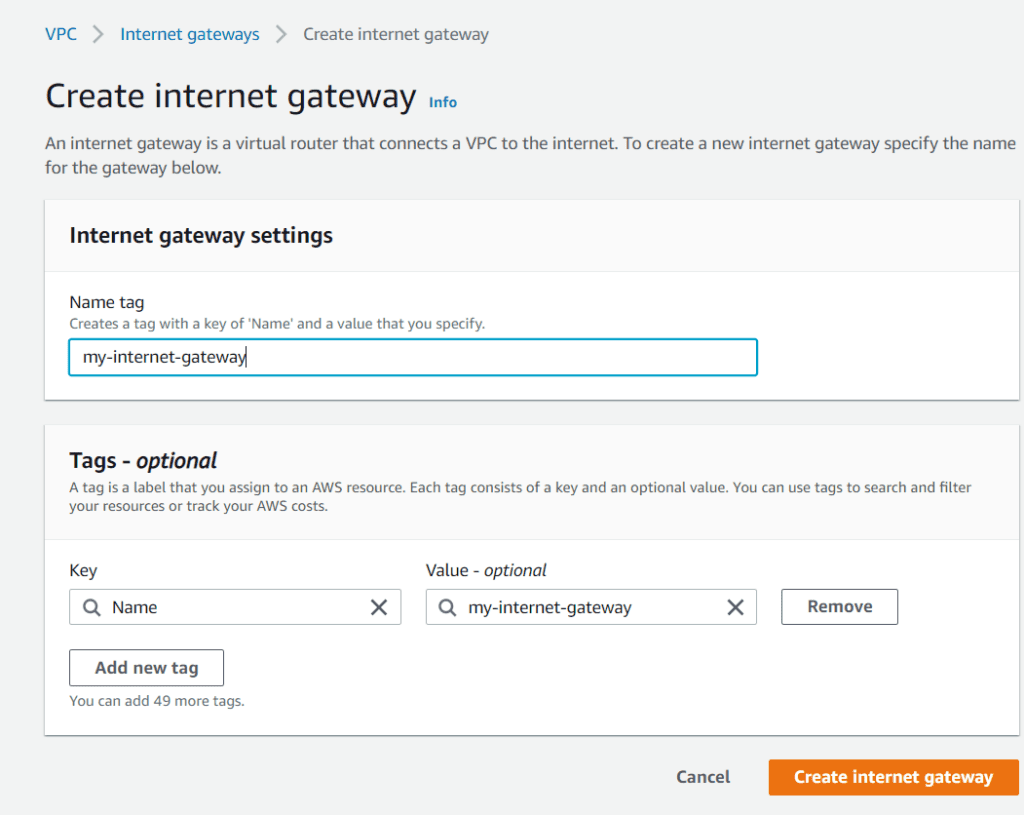
Go to the left-hand drop-down menu and select Internet Gateway. Choose to Create internet gateway, give it a name, and finish by clicking Create internet gateway.
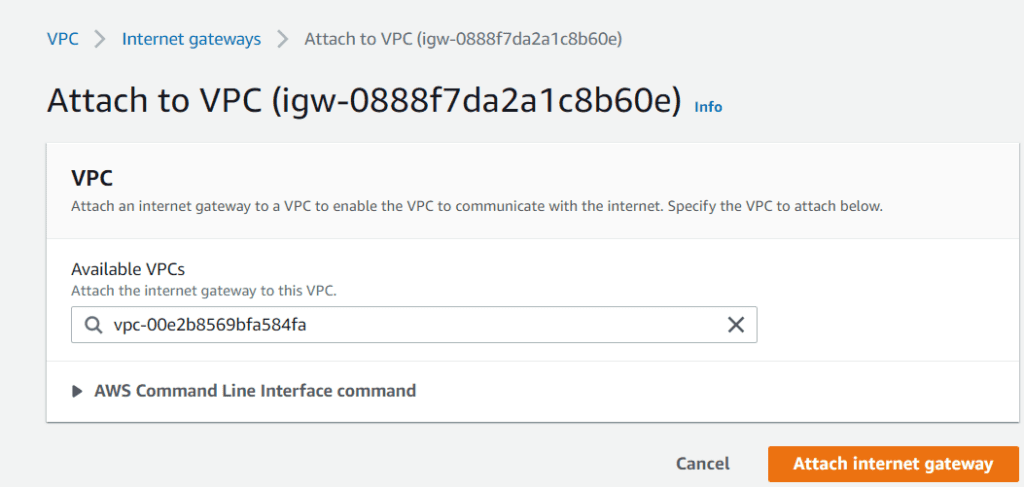
Select Actions inside your internet gateway and Attach to VPC.
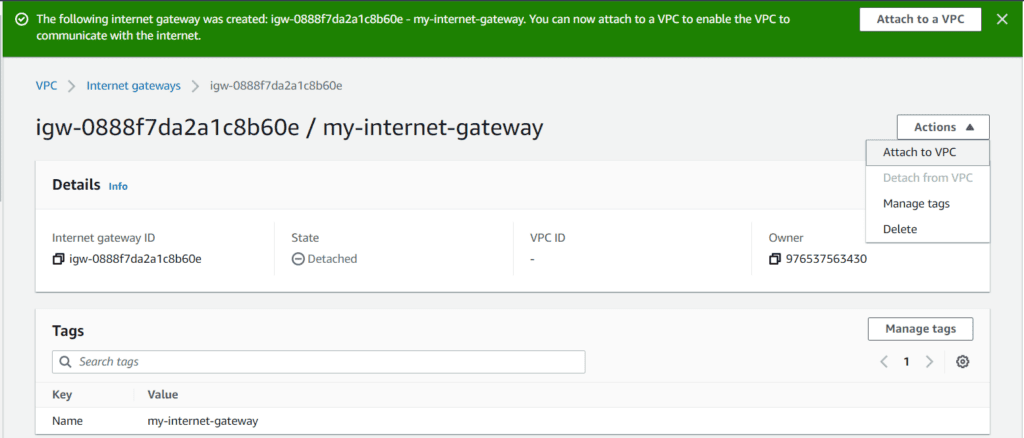
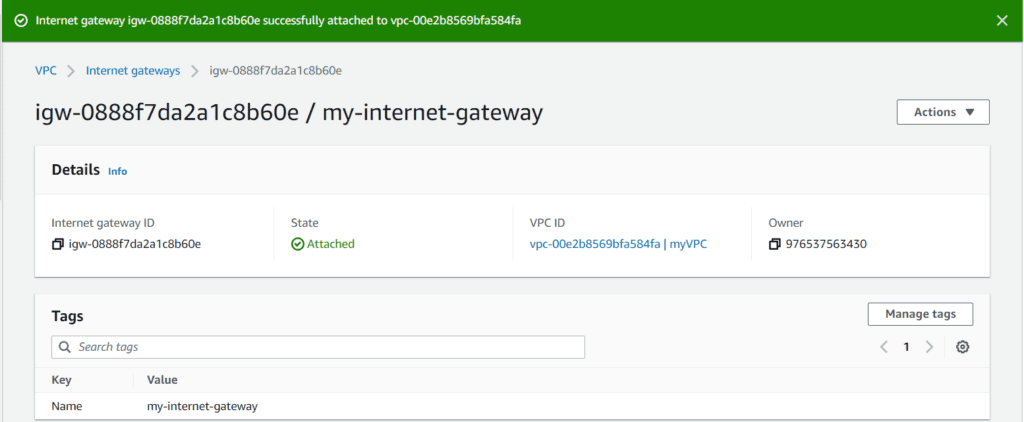
Next, choose your VPC and then click on Attach internet gateway.
We are now done with creating and setting up an internet gateway.
-
Setup a NAT Gateway
A NAT gateway stands for Network Address Translation (NAT) service. You can employ a NAT gateway to enable the instances in a private subnet to connect to services outside the VPC. Still, external services cannot initiate a connection with those instances.
- In the navigation pane, choose NAT Gateways.
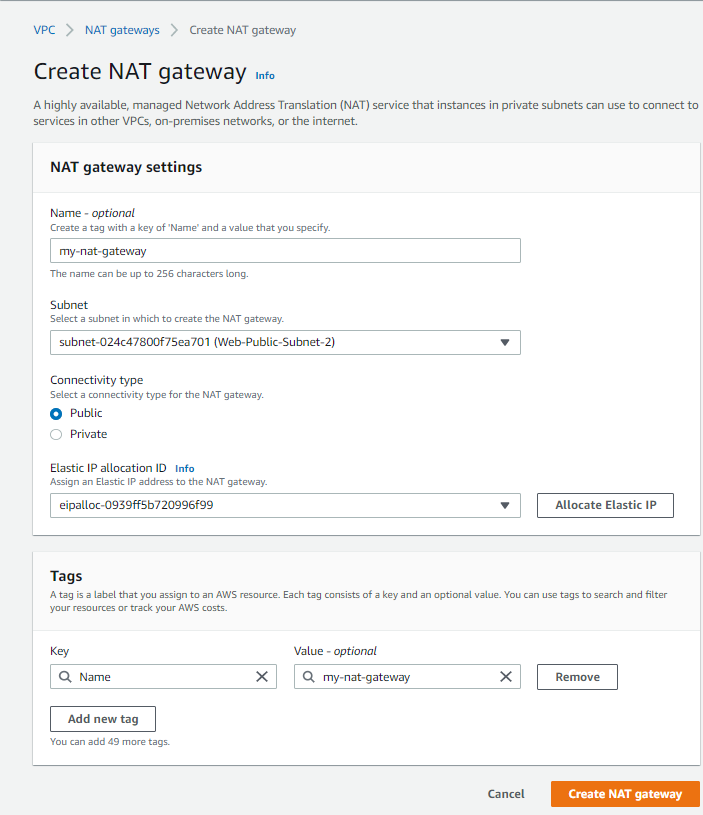
- Choose Create NAT gatewayand do the following:
- (Optional) Specify a name for the NAT gateway. This creates a tag with the key Name and the value the name you specify.
- Choose the subnet in which you want to create the NAT gateway.
- For the Connectivity type, select Privateto create a private NAT gateway or Public (the default) to create a public NAT gateway.
- (Public NAT gateway only) For Elastic IP allocation ID, select an Elastic IP address to associate with the NAT gateway.
- (Optional) For each tag, choose toAdd a new tag and enter the key name and value.
- Choose Create a NAT gateway.
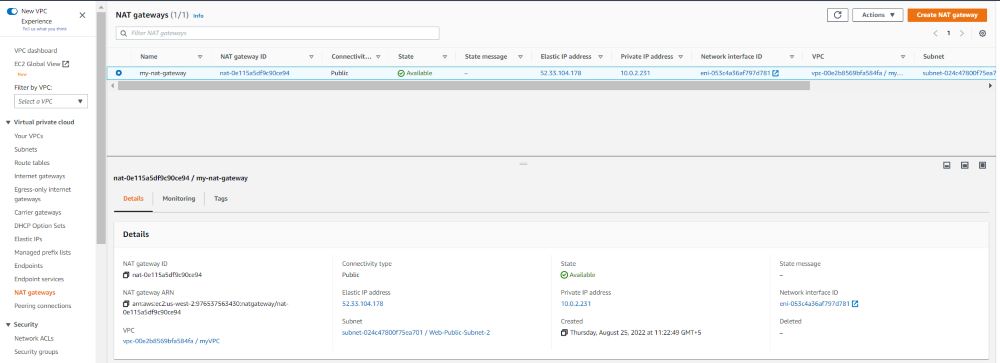
- The NAT gateway’s initial status is Pending. After the status changes to Available, the NAT gateway is ready for you to use. Ensure that you update your route tables as per the requirements.
-
Create the Route Tables and Associate them with the Relevant Subnets
Next, we will go to the Route Tables page. A route table contains a set of rules, called routes, that you use to ascertain the direction of network traffic from your gateway or subnet.
Although your subnets should be linked to the main route table by default, you have to ensure each tier has its routing table.
For the Subnets of Application and Database Tiers, you will create two Private Route Tables for each Subnet. Once you are done creating them, you will have to make a public route table for your two Presentation (Web) Subnets.
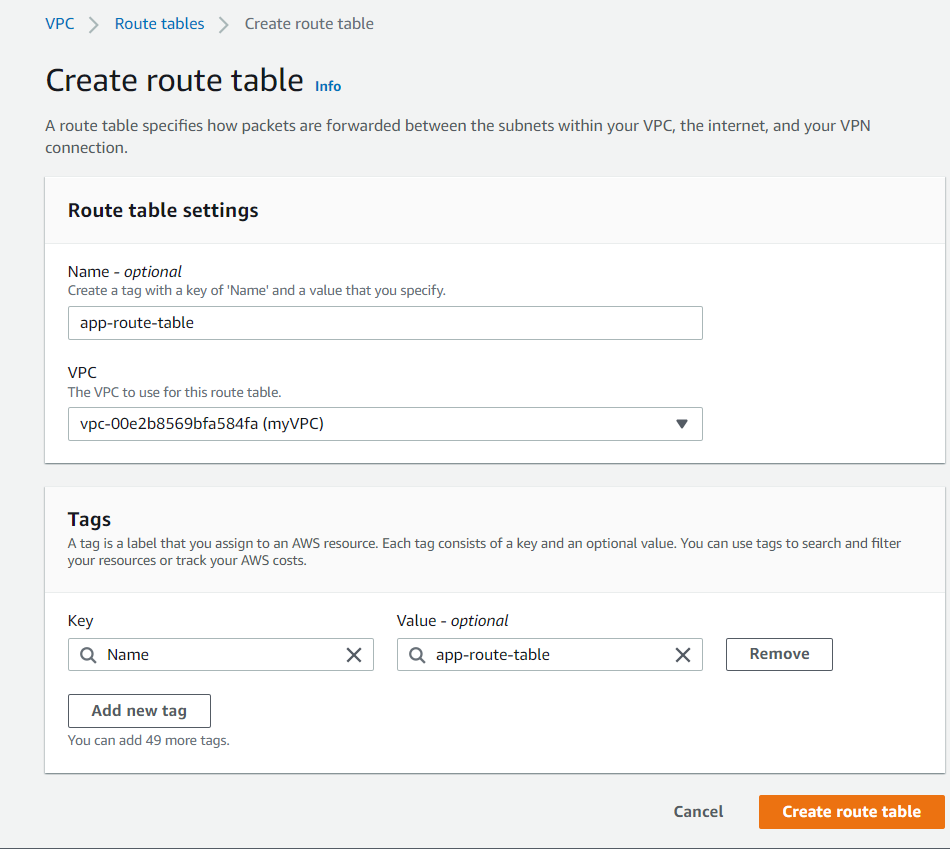
You can start this by selecting Create route table, naming it, then finding your VPC and choosing Create route table. Repeat the same process for DB and Web Route Tables.
Select Subnet associations and then Edit Subnet associations inside your new route table. For each table, you can associate the different subnets. Click on Save association at the end of each configuration.

Route Table association for DB Subnets:

Route Table Association for Presentation (Web) Subnets:

Finally, your route tables look like this:

Now, we need to associate our public route table with the internet gateway that we created earlier under the Edit routes section. Then click on Save Changes.

Next, go to your private Application Tier route table and select the NAT gateway as the target. Then click Save changes.

-
Create a Launch Template with a Bootstrap script to Install & launch Apache
You can build a launch template that has the configuration details to launch an instance. You can use launch templates to store launch parameters so that you do not have to specify them every time you launch an instance. For example, a launch template can contain the instance type, AMI ID, and network settings that you usually utilize to launch instances.
We need to create 2 launch templates – one for the Presentation (web tier) and the other for the Application Tier.
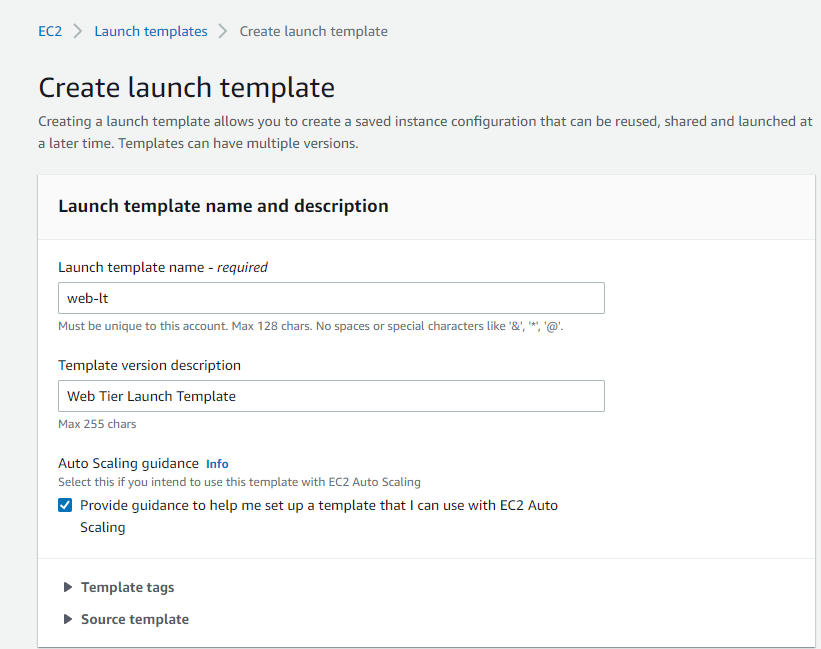
Select Launch Templates and Create launch Templates from the AWS EC2 Console. Click the Check the box for Provide guidance to help me set up a template that I can use with EC2 Auto Scaling under Auto Scaling guidance.
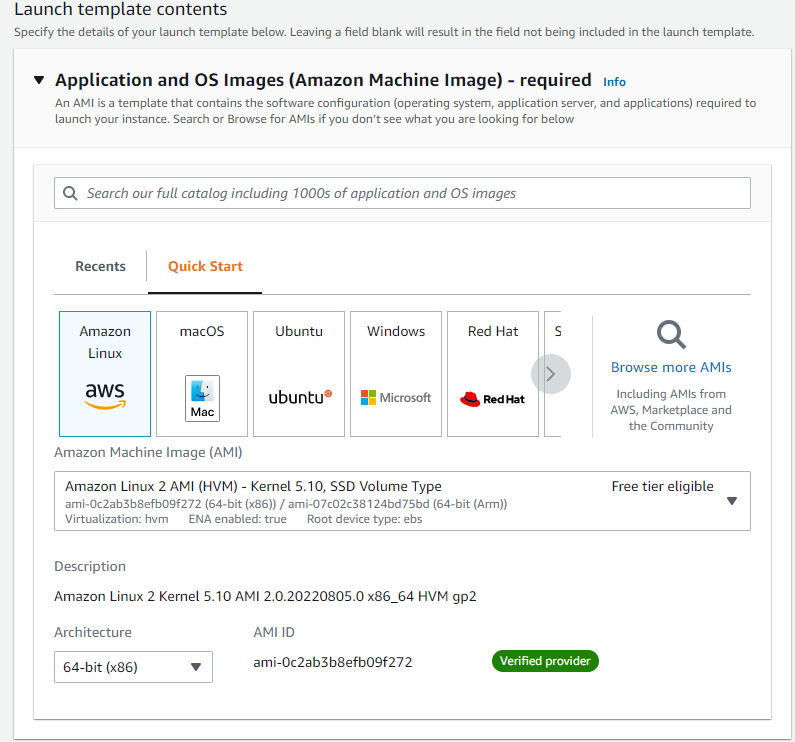
Select your preferred AMI under Launch template contents. Let’s use Amazon Linux 2 AMI with free tier eligibility for this blog.
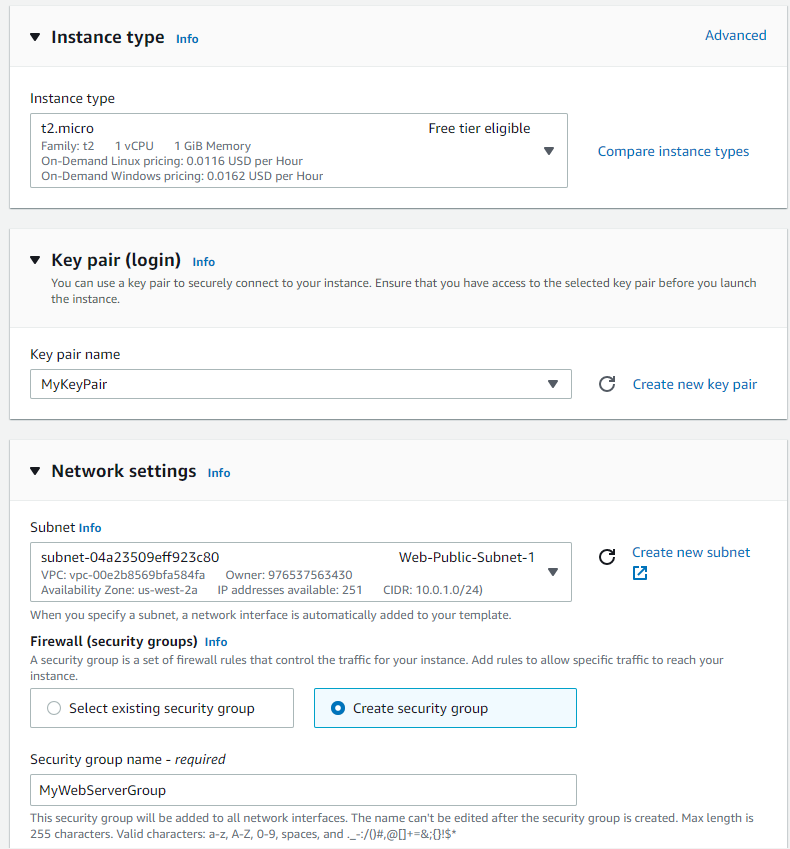
Select the relevant instance type and Create new key pair. Select the desired subnet from under the Network settings.
Create a new Security group using the following rules:
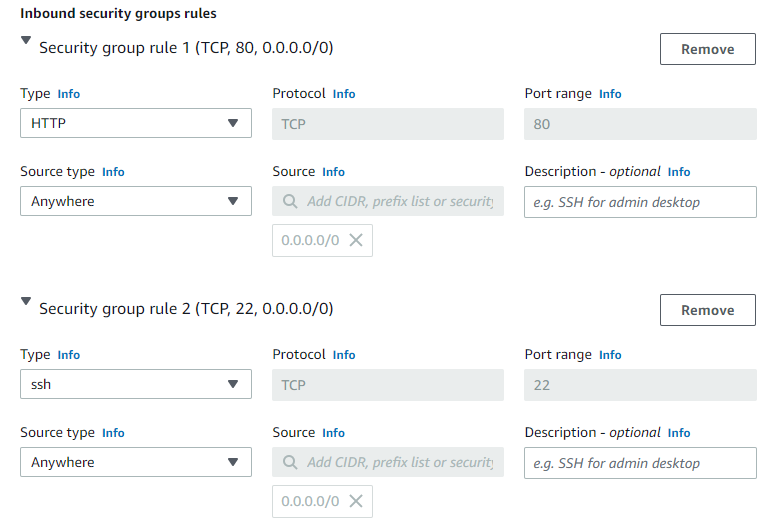
Lastly, scroll down under Advanced details until you see user data. Here you can bootstrap an Apache web server with your site details.
Please copy and paste the following code to launch a test web server.
#!/bin/bash
yum update -y
yum install -y httpd
systemctl start httpd
systemctl enable httpd
echo “<html><body><h1>We have successfully launched the Web Tier!</h1></body></html>” > /var/www/html/index.html
Finish up by selecting “Create launch template”.
P.S. Although you have to execute the same process for the application tier launch template, you will have to give it a different name and security group. For this article, let’s name it “app-lt.”
-
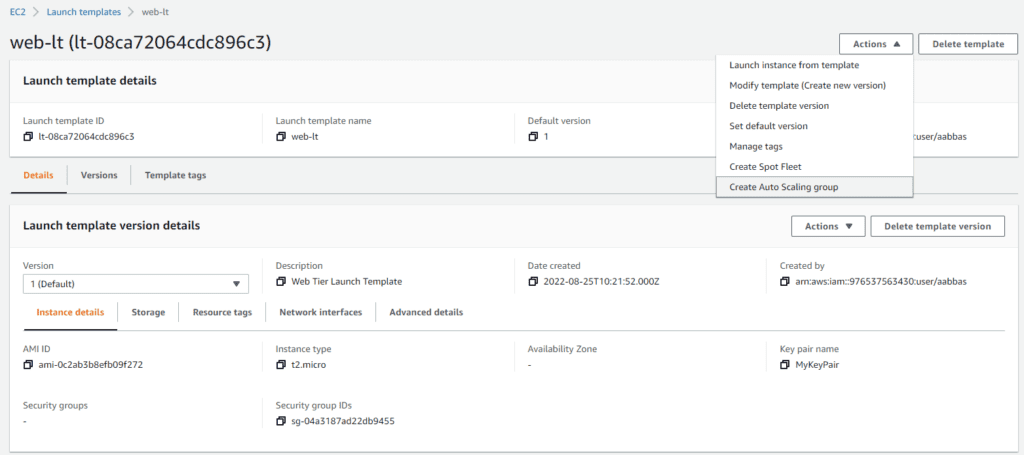
Create Auto Scaling Group
Let’s start creating an Auto Scaling Group from the same Launch Template page by selecting any of the templates. Go to the Actions menu and select Create Auto Scaling group.
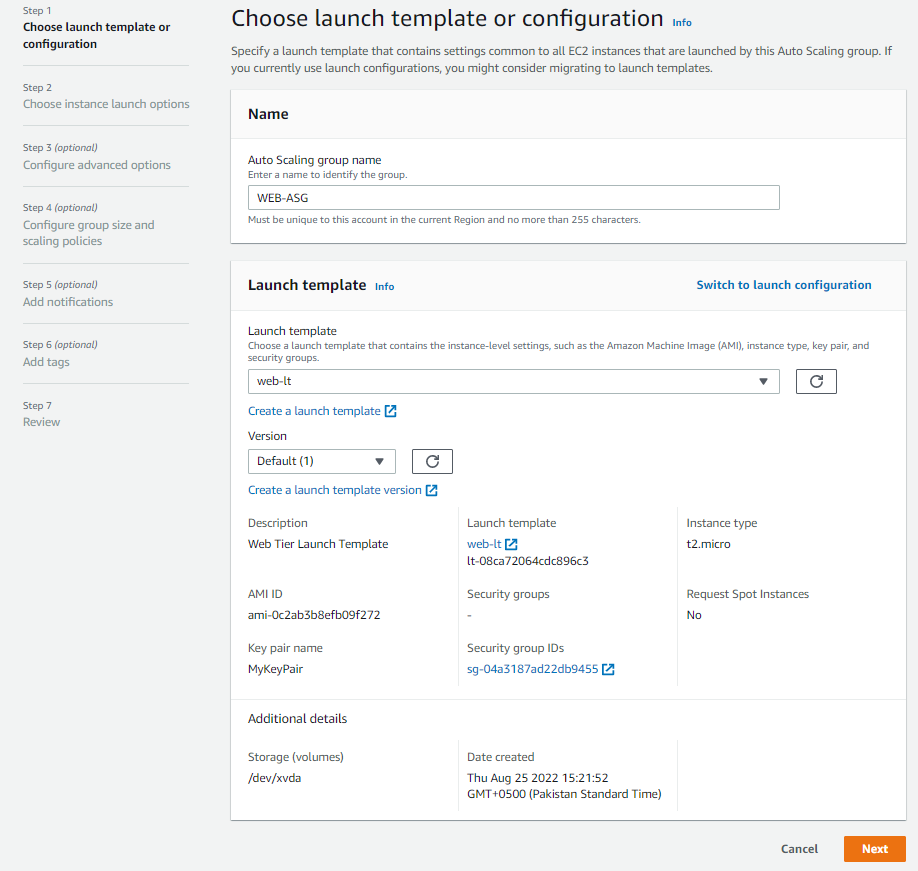
Name your Auto Scaling Group and click Next.
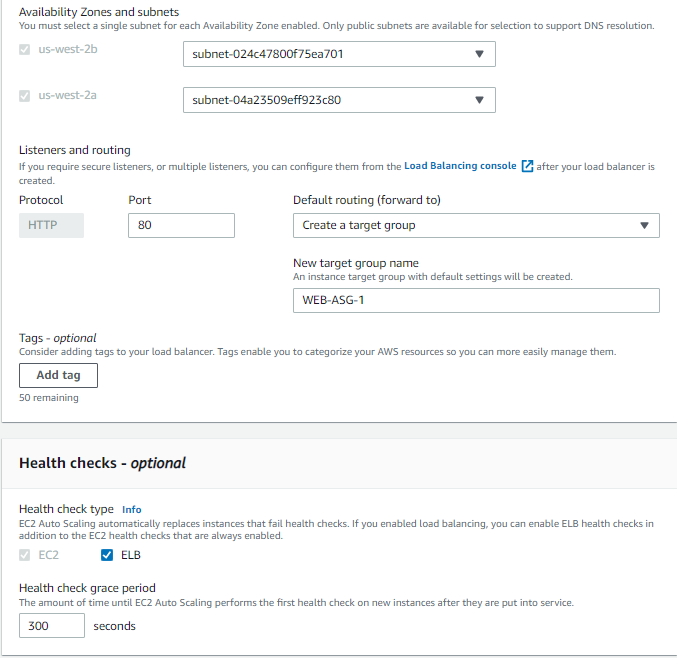
Next, choose Instance Launch Options. Select the desired VPC and both the Public Web Subnets, where you need to create the EC2 instances for the Presentation tier.

Next, we need to attach a new Internet-facing Application Load Balancer.
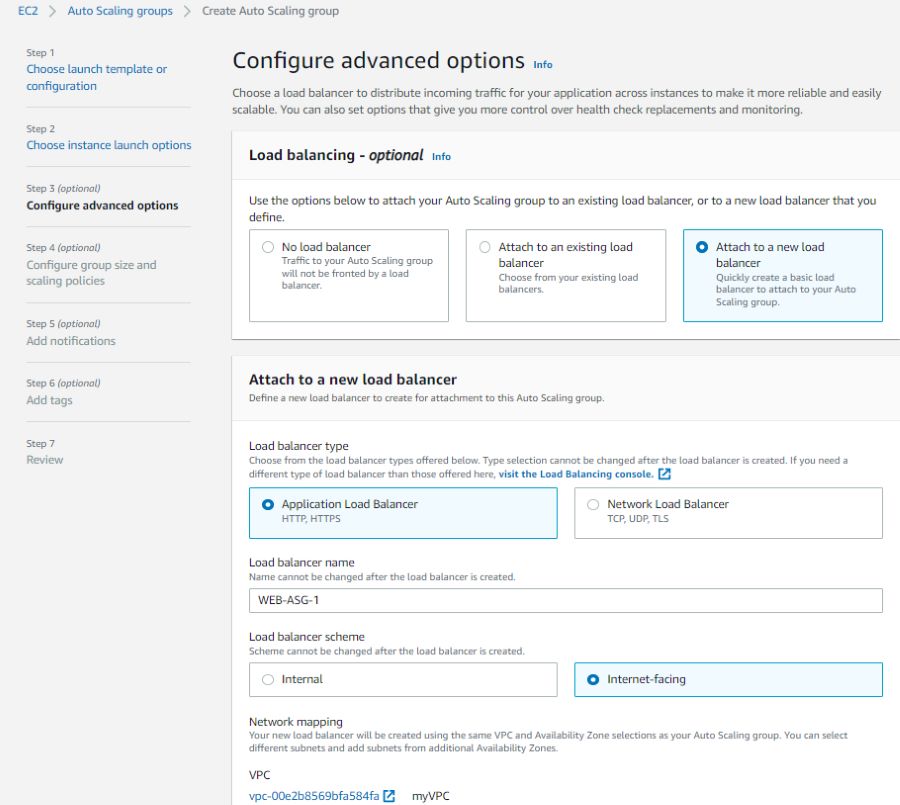
Your target group must have a listener rule with port 80.
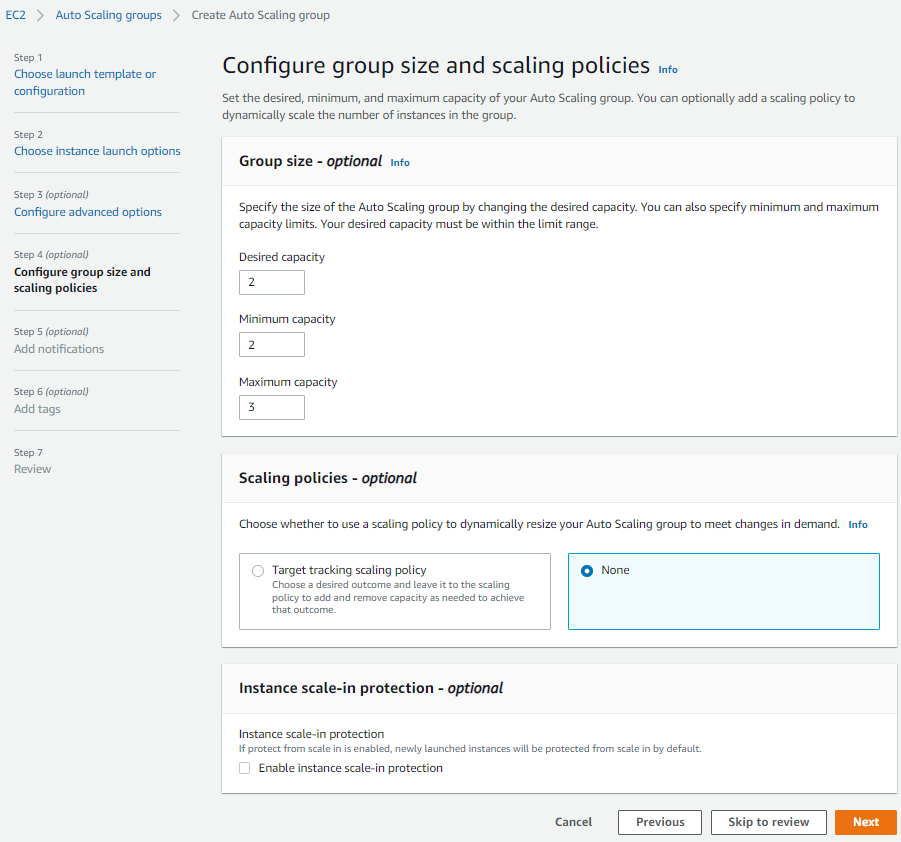
Now we have to configure the group size and scaling policies. For this demo, let’s keep the desired capacity of 2, a minimum of 2, and a maximum of 3. You can adjust these numbers to fit your needs. After this, you can select Next until you can choose to Create Auto Scaling group.
You need to repeat this for the application tier by selecting Create an Auto Scaling group. Choose a different name, launch template (app-lt template), and the subnets (application subnets). Please make sure that the ASG for the application tier is internal-facing, not internet-facing, like for the web tier.
-
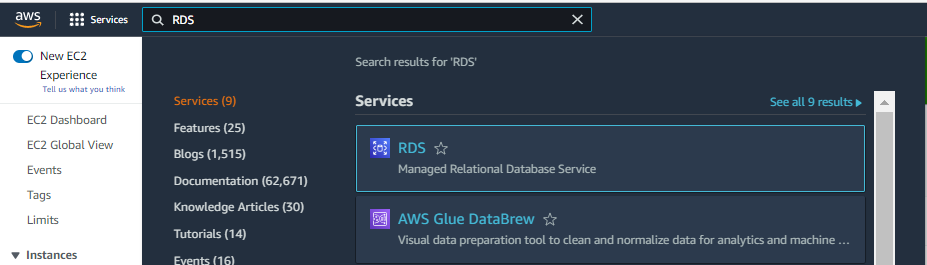
Navigate to the RDS Service
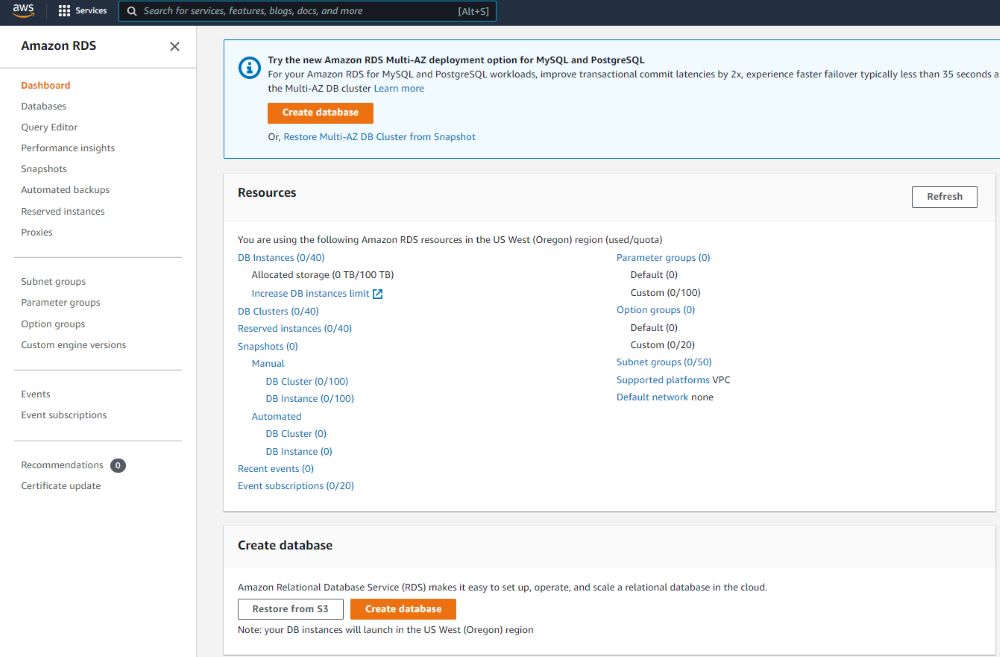
Go to the RDS Service on your AWS Management Console.
Then click on Create Database at the top of the page or under the Resource section.
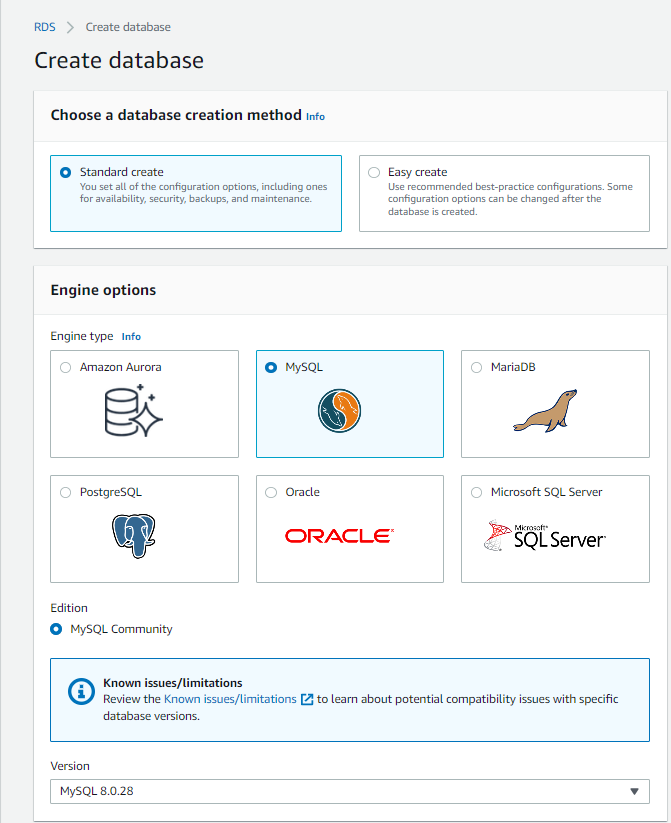
We will use the Standard create a method to build our database. Also, since we are sticking with the Free Tier, we will use a MySQL database as opposed to Amazon Aurora.
- Creation Method: Standard
- Database Engine: MySQL
- Edition: MySQL Community 8. x
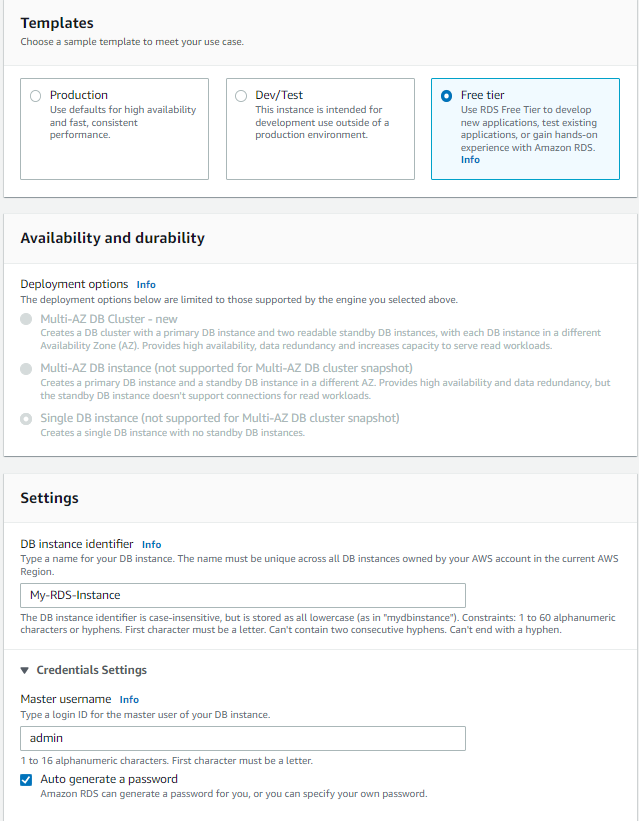
- Template: Free Tier
- DB Instance Identifier: Give a friendly name for your
- Master username: Feel free to change or use “admin”
- Password: auto-generate
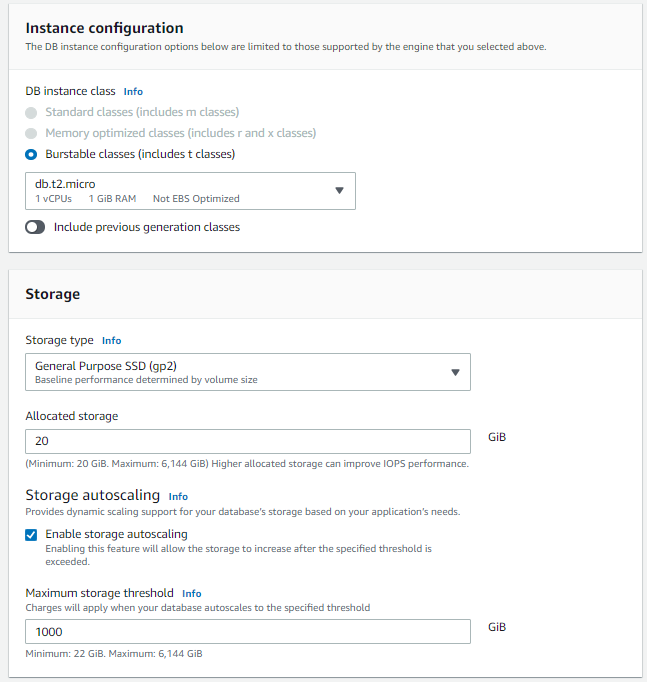
- DB Instance Size: We are sticking with the Free Tier so DB.t2.micro
- Storage Type: General Purpose
- Storage: 20GB
- Storage Autoscaling: Enabled
- Availability & Durability: This will be greyed out for the tutorial and using the Free Tier. For Production use cases, ensure you have a Multi-AZ set up and a large DB Instance Size, etc.
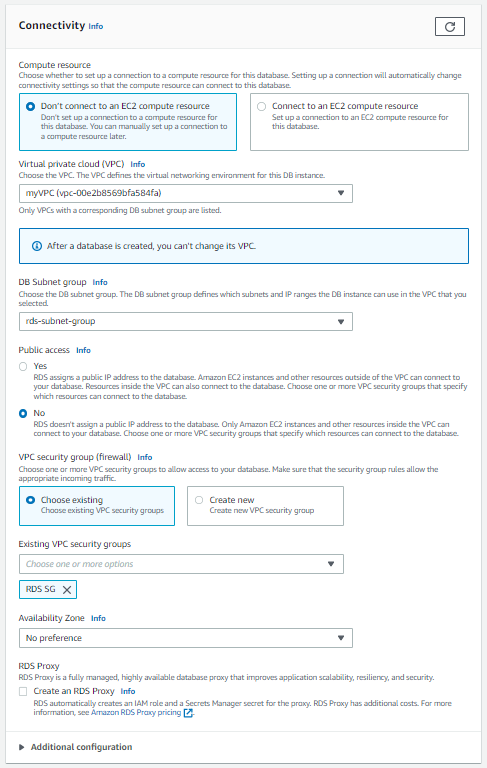
- VPC: Choose the VPC we made for this series
- Subnet: Leave as-is for now as this setting is a bit confusing
- Public Access: No
- VPC Security Group: Select the Security Group we created
- Availability Zone: Select the zone where you want your DB to reside
- Authentication: A password is fine for our purposes
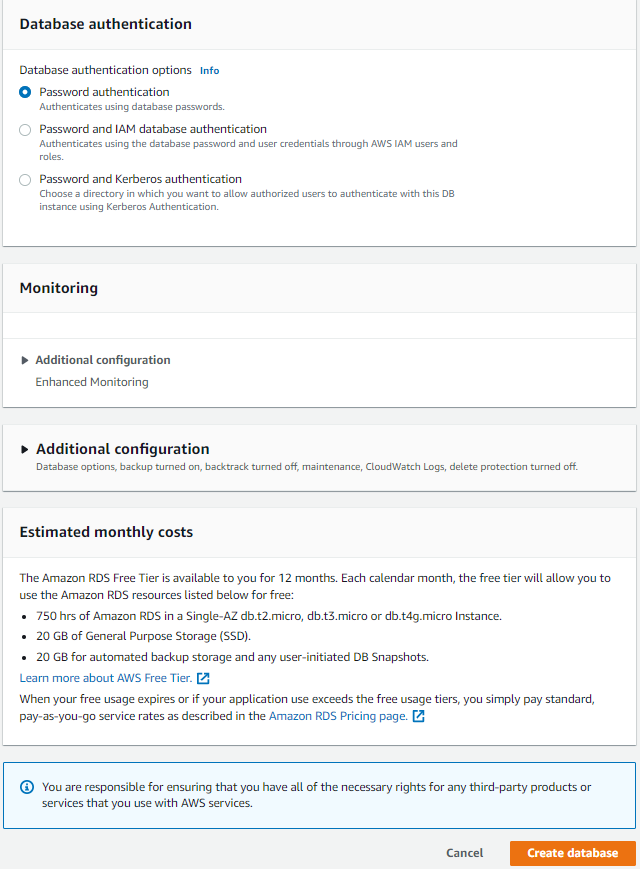
Click on Create database. It will take some time for the database to get ready. Initially, its status will be Creating. Once you have created the database, you might see the status changing to Backing-up or Available.


Note: You now need to ensure that you update the connectivity between the Application Tier and the Database Tier. To do this, go into your database, select the RDS security groups link, go to “inbound rules”, and update them to look like the following:

Now your Database Tier is ready to communicate with the Application Tier by keeping security in mind.
And that is how you make a highly available and fault-tolerant AWS three-tier Architecture.
-
Test Your Architecture
Using the DNS name of the Load Balancer, we can test our web tier in the browser like this:
Our Web Tier is reachable to the App Tier also (We have temporarily allowed ICPM from the Web Tier only in the App Tier Security Group):
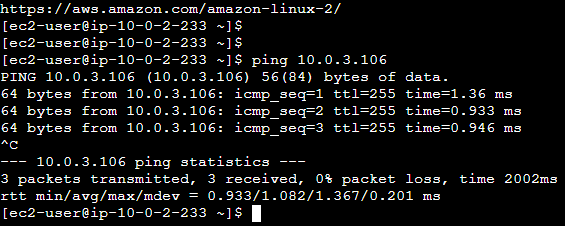
Our App Tier is reachable to the Database Tier as well:

Conclusion
Here we have done the required verifications for our Three-Tier AWS Architecture. We recommend that you go through this entire process and then move towards automation using some IaC tools like Terraform and CloudFormation. Just make sure you terminate, delete, or stop the services you don’t intend to use.
Contact us at [email protected] for further information.